What's Best Next

  • Newsletter
  • Our Mission
  • Contact
  • Resources
    • Productivity
    • Leadership
    • Management
    • Web Strategy
    • Book Extras
  • Consulting & Training
  • Store
    • Online Store
    • Cart
    • My Account
  • About
    • Our Mission
    • Our Core Values
    • Our Approach to Productivity
    • Our Team
    • Contact
You are here: Home / Archives for 1 - Productivity / d Productivity Systems (Architect)

Recommended Staplers, Staple Removers, and Tape

September 2, 2009 by Matt Perman

Post 7 in the series: Recommended Productivity Tools

Staplers

Yes, staplers are still relevant. For example, when most people need to read a longer document, they still prefer to print it out rather than read it on their computer. When you do this, you need to use a stapler.

When it comes to staplers, the key idea is: get one that’s sturdy. A lot of staplers are pretty weak. There is no need to get one of those. I recommend one like the above, which doesn’t feel like its going to fall apart when you use it. These are easy to find at Office Depot or Amazon.

The other rule of staplers is: don’t keep them on your desk. That unnecessarily clutters things up. They work fine in a drawer, even if you use it once a day or more.

Staple Removers

I actually don’t have a recommendation for a specific type here. The only thing I would say is: If you are going to have a stapler, it makes sense to have a staple remover. Store it right by the stapler in the drawer.

Tape

For tape I don’t actually have a recommendation, either. And as I mentioned in the introduction, I hardly ever use it. But on the occasions where I do need it, I don’t want to have to go looking for it. Since there’s room for it in the drawer by the stapler, I might as well have it around.

Posts in This Series

  1. Recommended Productivity Tools: An Introduction
  2. The Tools You Need to Have (And Where to Keep Them)
  3. Recommended In Boxes
  4. Recommended Capture Journals
  5. Recommended Pens
  6. Recommended Pencils and Paper Pads
  7. Recommended Staplers, Staple Removers, and Tape
  8. Recommended Scissors, Letter Openers, and Post-Its
  9. Recommended Paper Clips and Super Glue
  10. Not Recommended: Desktop Organizer Things
  11. Recommended Chairs and Waste Baskets
  12. Recommended Labelers and File Folders
  13. Recommended File Cabinets and Bookshelves

Filed Under: Productivity Tools

Recommended Pencils and Paper Pads

September 2, 2009 by Matt Perman

Post 6 in the series: Recommended Productivity Tools

Pencils

I use pencils for pretty much only one thing: underlining and writing notes in my books. Marking up your books is an important component of active reading. Hence, unless you only read books on the Kindle, it’s useful to have some pencils around.

When it comes to pencils, the main principle is: only use mechanical pencils. The non-mechanical kind needs to be sharpened, which means you need to keep a sharpener around, which makes things more complicated than you need.

The next thing to keep in mind with pencils is the size of the lead. As with pens, I recommend smaller. I get the 0.5mm pencils.

The last thing to keep in mind with pencils is that you want one that isn’t annoying to write with. I’ve found the Bic MatiC grip to work great. (I admit it — even though I don’t recommend Bic pens at all, their mechanical pencils are just fine). You can easily get them at Target, Office Depot, or even Amazon (and they qualify for free shipping if you have Amazon Prime).

Paper Pads

Paper pads are useful to have at your desk for capturing thoughts and such things. If you have a moleskine or other journal to serve as a capture tool, you’ll usually be using that (or your iPhone or computer). But it is still sometimes useful to be able to reach for a pad of paper.

I don’t recommend the full size legal pads, because they are so big. I recommend the smaller, 5×8 pads, which are easy to get at a place like Office Depot or Target. Here is an example.

Posts in This Series

  1. Recommended Productivity Tools: An Introduction
  2. The Tools You Need to Have (And Where to Keep Them)
  3. Recommended In Boxes
  4. Recommended Capture Journals
  5. Recommended Pens
  6. Recommended Pencils and Paper Pads
  7. Recommended Staplers, Staple Removers, and Tape
  8. Recommended Scissors, Letter Openers, and Post-Its
  9. Recommended Paper Clips and Super Glue
  10. Not Recommended: Desktop Organizer Things
  11. Recommended Chairs and Waste Baskets
  12. Recommended Labelers and File Folders
  13. Recommended File Cabinets and Bookshelves

Filed Under: Productivity Tools

Recommended Pens

September 1, 2009 by Matt Perman

Post 5 in the series: Recommended Productivity Tools

The One Rule of Pens

When it comes to pens, there is one very, very important rule: Never use a Bic pen.

If you have any Bic pens, please throw them away right now. (OK, maybe that’s a little extreme, but you get my point.)

The problem with Bic pens is that they skip frequently. This gets in the way of quick and efficient workflow. It is a frustrating to be capturing a fresh idea or action item (hopefully in a moleskine journal!), only to have the pen skip out on you every few letters. Plus, they simply aren’t fun to write with.

But finding a decent pen is surprisingly hard. A few years ago I got tired of my pens always skipping on me, so I tried a bunch of different kinds. Not many people probably do that, I grant. But I was curious to know if there was a pen that I would actually like using, without costing very much.

I determined that there are dimensions to choosing a pen: defining the qualities of a useful pen, kinds of pens, and the size of the line.

Qualities of a Useful Pen

As with all tools, you want to have a pen that you enjoy using. This doesn’t mean the pen has to be expensive. It does mean, however, that the pen should have at least four qualities:

  1. It doesn’t skip.
  2. It writes smooth.
  3. It isn’t annoying to hold.
  4. You like to write with it.

Kinds of Pens

There are two large categories of pens: disposable and non-disposable. The fountain pen is probably the most popular kind of non-disposable; there are also ballpoint and rolling ball non-disposables. We’re not concerned with non-disposables here.

I prefer a pen that is more economical, yet still writes well. This puts us in the camp of disposable pens. Among disposable pens, there are three main kinds of ink types to choose from: dry ink, gel, and roller ball.

Dry ink pens easily skip. Ballpoint pens are dry ink. The best example of the dry ink pen is Bic. The purpose of a dry ink pen is not to provide a good writing experience, but rather to be cheap. Because they use less ink, they last longer. But because they use less ink, they also don’t write as smoothly and tend to skip.

Gel pens write more smoothly. The flow is fairly even and it dries quickly. But, sometimes they blank out and sometimes they bleed/leak a bit.

Roller ball pens write smoothly and don’t skip. Also, I haven’t found them to bleed or leak at all. Hence, after testing out those pens from Office Depot, I discovered that my preference is a roller ball pen.

Line Size

When it comes to the size of pen to get, I discovered that I prefer the extra fine (which is 0.5 mm) because I write small. The next size up is the regular fine, at 0.7 mm.

Recommendation

In sum, I’ve found an extra fine roller ball pen to work the best. There are a few different brands you can choose from. My preference is the Pilot V5 rollerball pen, extra fine.

Update: I used to get these at Office Depot, but of late I am not able to find them. So I recently tried the Uni-ball Vision Elite, and found it to be just as good. So that’s the pen I recommend now.

At the end of this post now, I’m thinking to myself “why would I go into so much detail on pens???” Aside from the value of good tools discussed often throughout this series, the main reason is that it simplifies things. Whenever I need to get some more pens, I don’t need to think about what kind to get. Even though there are dozens of options in the aisle, it is a piece of cake to go right to the one that works and move on.

Posts in This Series

  1. Recommended Productivity Tools: An Introduction
  2. The Tools You Need to Have (And Where to Keep Them)
  3. Recommended In Boxes
  4. Recommended Capture Journals
  5. Recommended Pens
  6. Recommended Pencils and Paper Pads
  7. Recommended Staplers, Staple Removers, and Tape
  8. Recommended Scissors, Letter Openers, and Post-Its
  9. Recommended Paper Clips and Super Glue
  10. Not Recommended: Desktop Organizer Things
  11. Recommended Chairs and Waste Baskets
  12. Recommended Labelers and File Folders
  13. Recommended File Cabinets and Bookshelves

Filed Under: Productivity Tools

Recommended Capture Journals

September 1, 2009 by Matt Perman

Post 4 in the series: Recommended Productivity Tools

First things first: Why should you have a physical capture tool?

  1. You aren’t always at your computer.
  2. Sometimes it is faster to just write down your ideas.
  3. You can draw and mind map more easily in a physical notebook (though for more extensive mind mapping I recommend a software program like Mind Manager).

What, then, should you use for your physical capture tool? I recommend a Moleskine notebook. I have three reasons:

  1. They work well.
  2. They are fun to use.
  3. They have a sense of style.

As I discussed in the introduction to this series, when you find a tool to be a joy to use, you will make use of it more effectively. The moleskine notebooks exemplify this perfectly. You might find yourself brainstorming good ideas simply because you want to use the notebook.

There are many different kinds of Moleskines. In particular, I recommend the Moleskine ruled notebook large. I recommend the ruled one, rather than blank one, because I find it easier to capture notes and ideas. And I prefer the large one because it really isn’t that large (5″ x 8.5″) and provides more writing space than the pocket-sized.

For on-the-go capture, I also use Jott for iPhone (which allows voice capture and then transcribes it to text). So whether I capture something on-the-go in my journal or on my iPhone really depends upon what strikes me at the time (and what is most convenient). But I find that it is not enough to depend solely on my iPhone for capture.

When I’m at my desk, I use OminFocus and Evernote to keep track of my plans. So when I have an idea or action item to capture and I’m at my desk, I will often type it into a section at the bottom of my next action list in Evernote. But sometimes I will still use my journal for capture even if I’m at my desk.

The bottom line is: you will never regret having a physical capture tool, and the moleskine notebook is perfect.

As long as you don’t use a cheap pen.

And fortunately, I think recommended pens are next.

Posts in This Series

  1. Recommended Productivity Tools: An Introduction
  2. The Tools You Need to Have (And Where to Keep Them)
  3. Recommended In Boxes
  4. Recommended Capture Journals
  5. Recommended Pens
  6. Recommended Pencils and Paper Pads
  7. Recommended Staplers, Staple Removers, and Tape
  8. Recommended Scissors, Letter Openers, and Post-Its
  9. Recommended Paper Clips and Super Glue
  10. Not Recommended: Desktop Organizer Things
  11. Recommended Chairs and Waste Baskets
  12. Recommended Labelers and File Folders
  13. Recommended File Cabinets and Bookshelves

Filed Under: Productivity Tools

Recommended In Boxes

August 31, 2009 by Matt Perman

Post 3 in the series: Recommended Productivity Tools

For your physical in box, I recommend the silver steel letter trays that you can get at Target or Amazon. I used to have the plastic black letter trays from Office Depot, but I’ve recently switched over to these because they look a bit better.

As far as you to make the best use of your in box, it’s pretty simple: Put one on the top of your desk.

Some people stack several together and use the lower ones to hold pending items like material to read. I don’t do that because I prefer to only create very short-term, ad hoc pending stacks that I deal with right away. Pending items that need to be held for longer periods of time go into a file drawer (which will be covered when I, finally, get to my posts on filing).

If you have a desk at work and home, then obviously I’d recommend an in box at each location. Since my desk at home is in the basement, I also have an in box upstairs that I can easily toss stuff into.

As far as location goes, I recommend putting your in box on the left side of your desk. This creates a workflow of left to right: stuff to process starts on the left; you process it in the center; stuff that needs to be distributed elsewhere gets put into an “out” pile on the right.

Last of all, the big question here is: Is it “in box,” “inbox,” or “in-box”? I’ve seen all three. But when I think about it, I don’t think I like the looks of “in box” — which is the form I used in this post. So going forward, I’m going to start writing “in-box.” (If you have an opinion, let me know!)

Posts in This Series

  1. Recommended Productivity Tools: An Introduction
  2. The Tools You Need to Have (And Where to Keep Them)
  3. Recommended In Boxes
  4. Recommended Capture Journals
  5. Recommended Pens
  6. Recommended Pencils and Paper Pads
  7. Recommended Staplers, Staple Removers, and Tape
  8. Recommended Scissors, Letter Openers, and Post-Its
  9. Recommended Paper Clips and Super Glue
  10. Not Recommended: Desktop Organizer Things
  11. Recommended Chairs and Waste Baskets
  12. Recommended Labelers and File Folders
  13. Recommended File Cabinets and Bookshelves

Filed Under: Productivity Tools

The Tools You need to Have (and Where to Keep Them)

August 31, 2009 by Matt Perman

Post 2 in the series: Recommended Productivity Tools

While the right tools are important, the tools themselves won’t get you organized. You need to know how to think about your tools and where to keep them. Otherwise, getting the right tools will simply create clutter.

So before getting into the specific tools I recommend, I’m going to do two things. First, I’m going to outline the basic categories that everything you can possibly have at your desk falls into. Second, I’ll give a brief overview of all the tools that may be useful to have in your workspace and where they should go at your desk.

Understanding Workspace Setup

I posted some notes on workspace organization last week in anticipation of this series, so that may be worth looking at. The most relevant concept for our purposes here is that there are two kinds of things at your desk: permanent stuff and transient stuff.

Permanent Stuff

Permanent stuff falls into four categories: equipment, supplies, decoration, and reference.

Equipment goes on the desk if its used more than once per day, and in a drawer if not. Supplies go in a desk drawer in small amounts, with extras being kept in a cabinet or supply room. Decoration goes on the desk and walls, but should be kept limited. Reference items go in file cabinets and on bookshelves.

Transient Stuff

Transient stuff falls into three categories: input to be processed, action reminders, and project support materials.

Input to be processed goes in the in box. Action reminders will be in your task management software or, if you are paper-based, planner. Project support materials would be in electronic files and possibly some physical files.

The tools that we’ll be discussing in this series fall into the categories of equipment and supplies.


Core Tools and Their Locations

Here is an overview of the physical productivity tools you need to have and some brief words on where they go. My aim here is to provide you enough details on where to keep things to get you started; I’ll provide more details on desk setup in a future series.

The Desktop

On the top of your desk you should have your in box, computer monitor, any necessary computer peripherals, at least one pen, and maybe a pencil. If desired, you might maybe also want to have a desk lamp, a decoration or two, and a printer if you have one to yourself and there is room.

And that’s it.

The rest of the desktop is for working and just plain providing some breathing space. Any additional items will get in the way and, at least unconsciously, be a nuisance. The key principle is: keep your desktop as clear as possible.

Drawers

I’ll go into more detail on how to set up your drawers in my series on desk setup. But for the tools I’m covering here, two drawers are sufficient.

Drawer #1

In one of the drawers at your desk you should keep these items: pens, pencils, extra pencil lead, paper clips, scissors, a letter opener, and a unit of post-its. You might also want to have some rubber bands, super glue, twist-tie-things that come with the cords in neat new electronics gadgets, business cards, Advil, and maybe a few other things that fit and are useful (some permanent markers, a small ruler, etc.).

Don’t keep too many extra pens and pencils in this drawer; 5 of each is plenty. The point is to have a reserve to draw from if the one you are using on your desk runs out, you misplace it, or you just want to grab a few more for some reason. If you have any additional pens and pencils beyond the 5 or so, they go in a supply closet where you store extra supplies.

Regarding super glue and rubber bands: I admit that I hardly ever use these things. Having them around at all may be an old hold-over from when less stuff was computer based. Or maybe I just have rubber bands in there because I think it’s neat. The super glue is there because we have kids who sometimes break things. So, obviously, some things here are more or less relevant to each person’s specific situation.

Regarding the twist-tie-things: Whenever I get a new electronic gadget, I save those twist-ties the cords come tied up with. Or, I should say, I save them unless they are the flimsy kind. They really come in handy to tie up any cords that are longer than needed, so as to keep them from becoming unruly. I use them all the time.

Drawer #2

In another drawer you should have this equipment: stapler, staple remover, tape, and a labeler.

I admit that I hardly ever use the tape. But if I ever need it, I don’t want to have to go walking to find some. There’s space for it, so it’s easy enough to keep around.

The stapler I use about every other day or so. Whatever you do, do not keep your stapler on your desk. That just looks ugly. It goes in a drawer. So does the labeler.

I also keep a stack of blank CD-RWs in this drawer, some sleeves for the CDs, and a cloth to clean my screen.

Additional Drawers

If you have additional drawers, other stuff that you might want to keep in them include: chargers, extra batteries, Kleenex, and printer paper (if you have a printer at your desk). If you have a cubicle with a storage bin or a desk with some type of hutch on one part of it, these items also work well in there.

Obviously there is probably a lot of other stuff some people keep in their desks. That’s fine, but my recommendation is to keep the amount of stuff you have around to a minimum. Have only the essentials, and a bit more if it doesn’t take up any needed space.

Keep things to a minimum so that it is easier to keep them organized. The aim is easy, finger-tip access so that your workspace functions like an effective cockpit.

Around Your Desk

Around your desk are chairs, wastebaskets, and maybe bookshelves.

Supply Room

Extra supplies go in a supply room. Keep at your desk what you use, and keep extras somewhere else to avoid clutter. For example, if you have a printer and keep printer paper around your desk, keep one unit around. Keep extra units in the supply room.

Portable

Kept portable and with you should be your capture journal.

Posts in This Series

  1. Recommended Productivity Tools: An Introduction
  2. The Tools You Need to Have (And Where to Keep Them)
  3. Recommended In Boxes
  4. Recommended Capture Journals
  5. Recommended Pens
  6. Recommended Pencils and Paper Pads
  7. Recommended Staplers, Staple Removers, and Tape
  8. Recommended Scissors, Letter Openers, and Post-Its
  9. Recommended Paper Clips and Super Glue
  10. Not Recommended: Desktop Organizer Things
  11. Recommended Chairs and Waste Baskets
  12. Recommended Labelers and File Folders
  13. Recommended File Cabinets and Bookshelves

Filed Under: Productivity Tools

Recommended Productivity Tools: An Introduction

August 30, 2009 by Matt Perman

Post 1 in the series: Recommended Productivity Tools

Posts in This Series

  1. Recommended Productivity Tools: An Introduction
  2. The Tools You Need to Have (And Where to Keep Them)
  3. Recommended In Boxes
  4. Recommended Capture Journals
  5. Recommended Pens
  6. Recommended Pencils and Paper Pads
  7. Recommended Staplers, Staple Removers, and Tape
  8. Recommended Scissors, Letter Openers, and Post-Its
  9. Recommended Paper Clips and Super Glue
  10. Not Recommended: Desktop Organizer Things
  11. Recommended Chairs and Waste Baskets
  12. Recommended Labelers and File Folders
  13. Recommended File Cabinets and Bookshelves
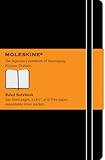
Today we’re starting a series on recommended productivity tools. I’m going to cover some basic tools that you need to have and point out which ones work best to make your work smoother, less frustrating, and more enjoyable.

I have in mind here physical tools, rather than electronic tools. Which leads right away to the question: What? Why care about physical productivity tools?

Why Care About Physical Productivity Tools?

There are two reasons to still care about physical productivity tools.

First, even though we live in an electronic age, we still need to do some physical things. Physical “stuff” will always be with us in some form or another. As long as there is a need to do physical stuff, there is also a need to have the physical tools that enable us to work as effectively as we can.

In fact, sometimes physical tools are preferable to electronic. For example, I often prefer capturing ideas and notes in my moleskine notebook over capturing them electronically. This is not always the case, but sometimes it is faster and simpler. This brings into play two physical tools: a capture journal and a pen.

Second, it’s worth giving some reflection to physical productivity tools because most attention is given to electronic tools. And that is just as it should be. But since we still need to use physical tools, someone needs to give some attention to which ones will serve you best.

The Value of Good Tools

My aim in this series is to point out which tools work well and which you will most likely to enjoy using. A fundamental assumption behind that purpose is that having good tools matters. There are at least three reasons for this.

First, if you have good tools, you often times want to use them. This in turn makes your work a bit more enjoyable, and this pays dividends for your productivity. David Allen makes a good point when he writes: “one of the best tricks for enhancing your personal productivity is having organizing tools that you love to use” (GTD, 96).

Second, bad tools get in the way. This creates unconscious resistance to getting things done.

Third, it is important to make your workspace in general a place you want to be. The tools you have at hand are part of that environment, and thus contribute to your overall sense of satisfaction with your work environment. If you have tools that you enjoy using, you are that much more likely to enjoy your workspace in general – which enhances your ability to get things done.

Note, however, that having good tools does not necessarily mean having expensive tools. David Allen rightly notes: “Often, on the low-tech side, the more ‘executive’ something looks, the more dysfunctional it really is” (Getting Things Done, 91). A good tool is a tool that works well and that you want to use.

In the next posts we’ll give a quick overview of the main kinds of physical tools you need to have. A corollary question is where you should keep these tools for optimal access (and minimal distraction), so we’ll cover that to. Then, I’ll cover each tool individually for the rest of the series.

>> Go to next post The Tools You Need to Have (and Where to Keep Them)

Filed Under: Productivity Tools

Thoughts on How to Schedule Your Week

August 27, 2009 by Matt Perman

I’ve advocated in previous posts that, when planning your week, you should proactively choose several “big rocks” to accomplish that week. These are the most important tasks that you can do that week, and they should stem from your values, goals, roles, and/or major projects.

Here’s what I haven’t said before: I think it may work best to keep the number of big rocks down to about 5. If you can accomplish one big rock per day, you will be making huge progress.

But if you try to put much more than that on your agenda for the week, one of two things will likely happen. First, might not feel the freedom or time to address situations that come up — many of which are important, even though they could not have been foreseen. Or, second, if you do give yourself the freedom to turn your attention to them, you will feel frustrated by the inability to accomplish your plans. And so you will feel behind.

I’m writing this because that’s how I feel right now! I tried to schedule too many priorities into my week. If I had scheduled less, maybe I’d even feel about done right now, with everything else I do for the week being gravy. That would be nice — and maybe would result in more getting done, not less. Or, it would result in the ability to say “finished for now,” which I think is something that is extra hard these days but which we all need more of.

The concept of big rocks is from Stephen Covey’s book The 7 Habits of Highly Effective People. He advocates about 2-3 big rocks per role, which would end up giving you around 15 or so per week. He doesn’t give that as any hard and fast rule, but it does set up your expectations. Sticking down at 5 is a bit counter-intuitive, but I think it may be about right.

But we’ll see. That’s why I’ve called this post “thoughts on how to schedule your week.” In many ways, effectiveness is an ongoing experiment. You create hypotheses, test them, adapt, and repeat.

Filed Under: Scheduling

Notes on Workspace Organization

August 21, 2009 by Matt Perman

These are my notes from a few years ago on organizing your workspace. They reflect a combination of points from Organizing for Dummies, Getting Things Done, and my own thoughts.

More detail could be given, but in the meantime they outline the big picture. I especially find helpful the observation that all of the permanent stuff you might have at your desk falls into four categories: supplies, equipment, reference, and decoration.

After that, the concept of centers is especially  useful (although I currently do things a bit differently than what is represented in these notes).

Stuff At Your Desk

Permanent Stuff:

  • Supplies: In drawers. Small stocks (only what need). Extras in supply room.
  • Reference: File cabinets, bookshelves.
  • Decoration: On desk, walls; keep limited.
  • Equipment: On desk if used more than once per day; else, drawers.

Transient Stuff:

  • Input to be processed: In box
  • Current work items
  • [If not electronic] Action reminders: Calendar, next action lists, project lists
  • [If desired; I think these go best in a file drawer at your desk] Project support materials: Active projects file; planner.

Work Centers At Your Desk

Desktop centers:

  • Phone center
  • Computer center
  • Capture tool center or planner center [if you use a paper tool for either]
  • Work center

Drawer centers:

  • Pen/pencil/related supplies center
  • Mailing/finance center (if needed)
  • Stapler/filing center

File Centers [in file drawers]:

  • Pending
  • Projects
  • Operations
  • Reference
  • Archive

Basic Principles

  1. Like with like. One spot for all books. All filing cabinets together. Create centers for different tasks by grouping everything necessary for them together.
  2. Purge. All things that are unused or ill-suited should be tossed.
  3. Access. Goal is fingertip management. Use an L, U, or parallel shape for your desk. U is best, as it allows easiest access to the most desk space and equipment. Move infrequently used equipment, reference materials, and supplies to another room.
  4. Contain: Keep files in cabinets, books on shelves, and supplies in drawers.
  5. Evaluate: How do you feel? Does the work flow?
  6. The desk is a place to do work. Use REMOVE to reduce clutter and arrange desk properly.
    1. Reduce distractions.
    2. Everyday use (if not, drawers).
    3. Preferred side (all things go on right side if you are right handed; phone is one exception–it goes on opposite side).
    4. Organize together: Create work centers for phone, computer, time, etc. Phone center should include phone, message pad, pen nearby. Good for capturing thoughts and tossing into in-box as well.
    5. Empty the center (so you can work).
  7. Supplies are for the drawers. Group like things together. Turn each drawer into a work center: Central is pen/pencil; others are mailing/finance and stapler/filing.

Filed Under: Desk Setup

Do You Use an Electronic or Paper To-Do List?

July 8, 2009 by Matt Perman

Even in this age of incredible task-management software, when it comes down to your concrete next action list (or daily next action list), there are still advantages to pen and paper. As I’ve blogged before, I use OmniFocus to keep track of my goals, projects, and actions. But when it comes down to the specific actions that I want to do today, sometimes I find a lot of value in pen and paper.

If you create to-do lists, what do you use — software or paper?

Filed Under: Productivity Tools

  • « Previous Page
  • 1
  • …
  • 4
  • 5
  • 6
  • 7
  • 8
  • Next Page »

About

What’s Best Next exists to help you achieve greater impact with your time and energy — and in a gospel-centered way.

We help you do work that changes the world. We believe this is possible when you reflect the gospel in your work. So here you’ll find resources and training to help you lead, create, and get things done. To do work that matters, and do it better — for the glory of God and flourishing of society.

We call it gospel-driven productivity, and it’s the path to finding the deepest possible meaning in your work and the path to greatest effectiveness.

Learn More

About Matt Perman

Matt Perman started What’s Best Next in 2008 as a blog on God-centered productivity. It has now become an organization dedicated to helping you do work that matters.

Matt is the author of What’s Best Next: How the Gospel Transforms the Way You Get Things Done and a frequent speaker on leadership and productivity from a gospel-driven perspective. He has led the website teams at Desiring God and Made to Flourish, and is now director of career development at The King’s College NYC. He lives in Manhattan.

Learn more about Matt

Newsletter

Subscribe for exclusive updates, productivity tips, and free resources right in your inbox.

The Book


Get What’s Best Next
Browse the Free Toolkit
See the Reviews and Interviews

The Video Study and Online Course


Get the video study as a DVD from Amazon or take the online course through Zondervan.

The Study Guide


Get the Study Guide.

Other Books

Webinars

Follow

Follow What's Best next on Twitter or Facebook
Follow Matt on Twitter or Facebook

Foundational Posts

3 Questions on Productivity
How to Get Your Email Inbox to Zero Every Day
Productivity is Really About Good Works
Management in Light of the Supremacy of God
The Resolutions of Jonathan Edwards in Categories
Business: A Sequel to the Parable of the Good Samaritan
How Do You Love Your Neighbor at Work?

Recent Posts

  • How to Learn Anything…Fast
  • Job Searching During the Coronavirus Economy
  • Ministry Roundtable Discussion on the Pandemic with Challies, Heerema, Cosper, Thacker, and Schumacher
  • Is Calling Some Jobs Essential a Helpful Way of Speaking?
  • An Interview on Coronavirus and Productivity

Sponsors

Useful Group

Posts by Date

Posts by Topic

Search Whatsbestnext.com

Copyright © 2025 - What's Best Next. All Rights Reserved. Contact Us.